
Upgrading PostGIS
Insure that Webmin is installed and System Requirements met.
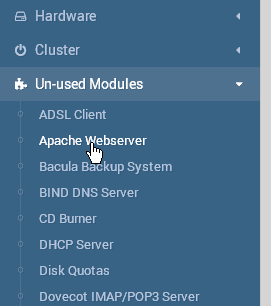
1. Log into Webmin and install Apache HTTP Server
Click on Unused Modules > Apache Webmin as shown below:
Click on the "Install Now" button as shown below:

2. Log in via SSH and download GeoHelm from GitHub:
wget https://github.com/AcuGIS/GeoHelm/archive/master.zip
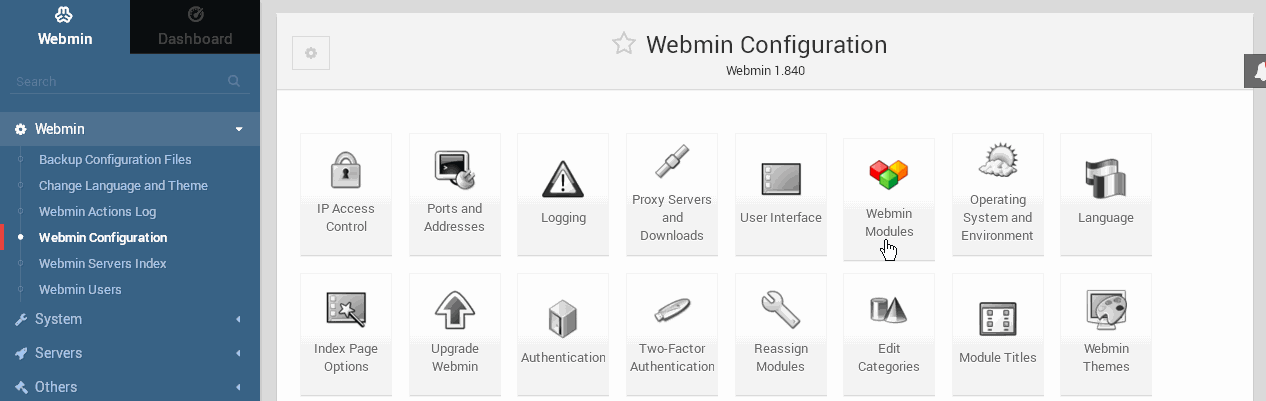
3. Prepare the Module for installation
unzip -q master.zipmv geohelm-master geohelmtar -cvzf geohelm.wbm.gz geohelm/4. Install the Module
Click on Webmin > Webmin Configuration > Webmin Modules
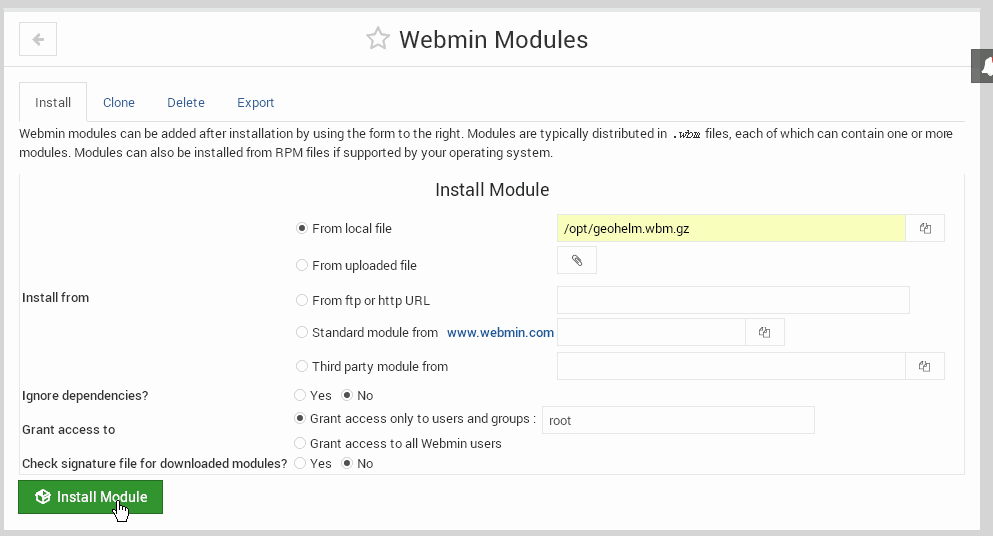
Enter the location you saved geohelm.wbm.gz to in step 3 above, then click Install Module:
You will see a message that the module has been installed as below:
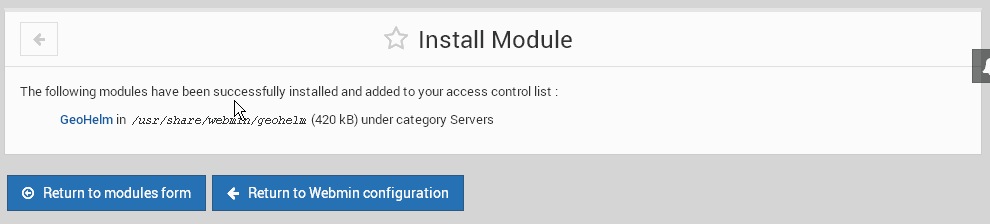
Click the Return to Webmin Configuration button and the click F5 to refresh the page.
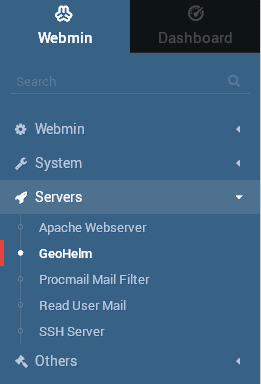
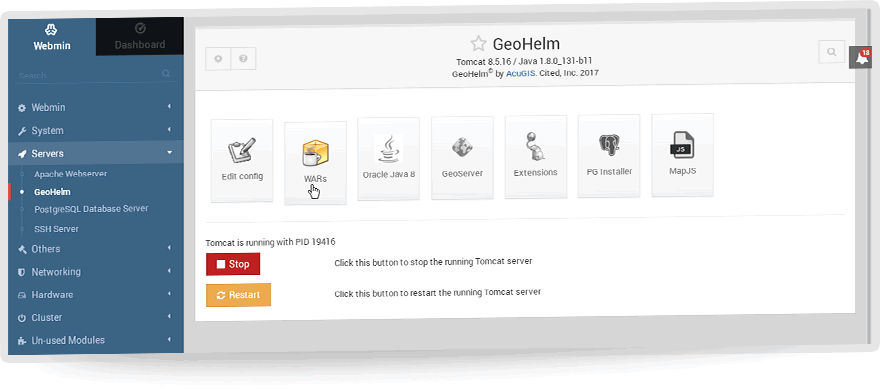
You should now see GeoHelm under the Servers menu as below:
5. Install Apache Tomcat
Click on Servers> GeoHelm in the left menu as show above.
Click on the Install Tomcat button as shown below:

This will download and install the latest, stable version of Apache Tomcat.
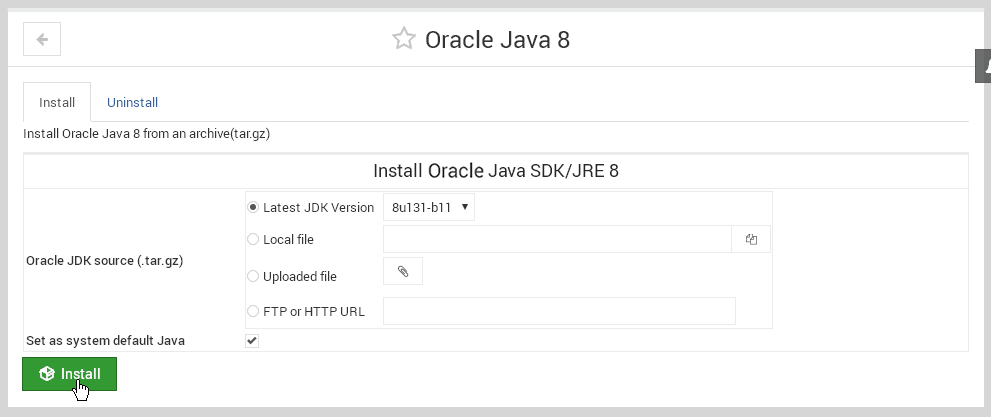
6. Install Oracle JDK
On the GeoHelm home page, click the "Java Tab" button as shown below:
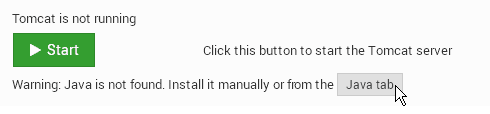
The screen below will appear. Click on the Install button as show below to install the latest Oracle JRE as show below:
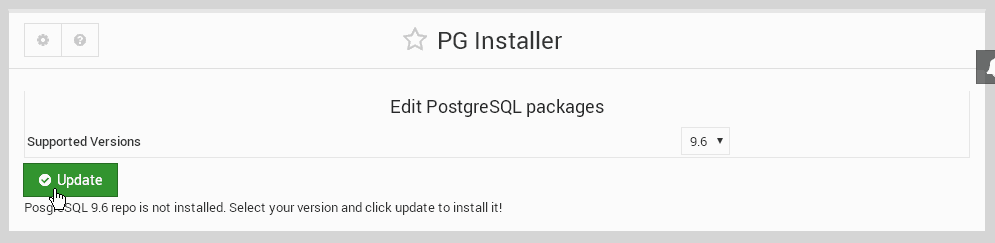
7. Install PostgreSQL Repository
Click on the PG Installer button as shown below (you can also click on PG Installer icon):

Click on the Update button as shown below to install the latest PostgreSQL repository:
The screen will reload. This may take a few seconds. Click the Return to PG Installer Button.
You will now be at the PostgreSQL Installer page as shown below.
*Important* You can return to this page at any time to install any additional packages.
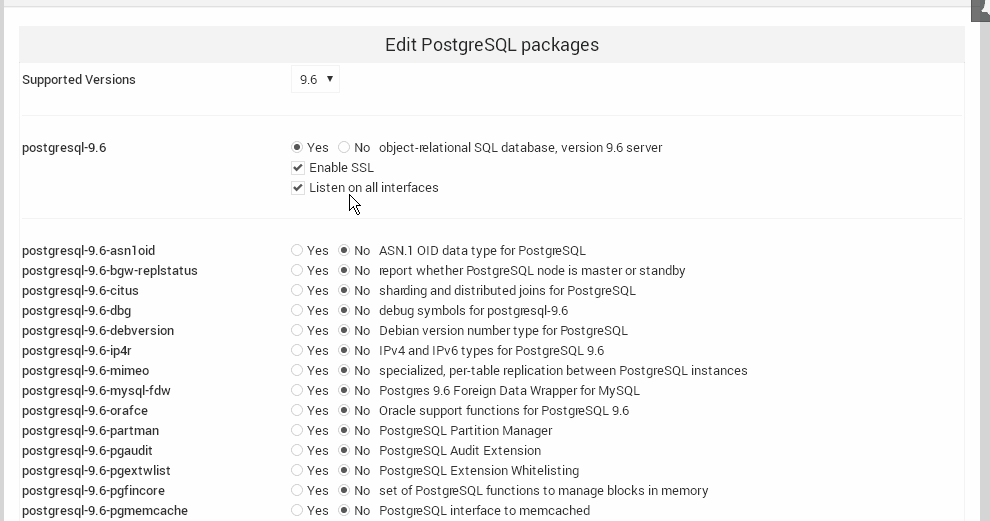
For now, just select the options below and click the Update button:
8. Install PostGIS and GIS Libaries
On the GeoHelm home page, click on the Click Here button as shown below:

This will download and install PostGIS as well as all required GIS libraries.
9. Install haveged
On the GeoHelm home page, click on the Install Now button for haveged.
Next, return to your SSH session and issue the following two commands:
service haveged start
systemctl enable haveged
Installing haveged will make Tomcat startup much faster.
10. Install GeoServer (Optional)
On the GeoHelm home page, click on the GeoServr icon.
You will see a screen as below. Click on Click Here to install the latest stable GeoServer.

Note that installing GeoServer will cause Tomcat to start automatically.
11. Optional Web App and GeoExplorer
If you wish to install our WebApp (this site) or GeoExplorer, click the appropriate button.
Otherwise click the Dismiss button.
12. Restart Apache
Click on Servers > Apache Webserver in the left menu.
Click the reload button to reload Apache.
13. Check Installation
Navigate to http://YourIP.com/geoserver or http://YourDomain.com/geoserver
Check that it is running and you are able to log in.
The default user name and password is admin/geoserver. Be sure to change this!
If you installed GeoExplorer, this will also be available at:
http://YourIP.com/geoexplorer or http://YourDomain.com/geoexplorer
14. Congradulations! You now have a full Open Source GIS Stack up and running!
Next: Read the manual or jump to component pages below.
Important Be sure to also view the sections below:
Moving the GeoServer Data Directory